| |
| Project Result | |||||||||||||||||||||||||
|
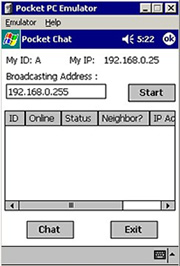
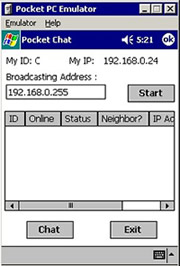
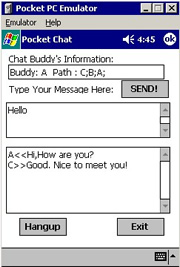
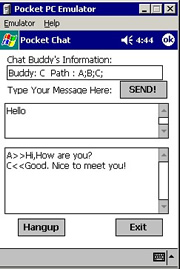
Base on the design described in chapter 4, we have developed a wireless Pocket PC multihop ad hoc instant messenger application: Pocket Chat. We set up the testing environment (configuration file) as described in diagram 4.11, in which Pocket PC A can connect to Pocket PC C through Pocket PC B or D. Launch the Pocket PC application by clicking on "My Device->Program Files->Winchat->PocketChat.exe", the following are the screenshots of the user interface on Pocket PC A and C (Diagram 5.1):
During the initiation phase of the program, our "Pocket Chat" application reads the Network configuration topology file at the same folder as "NodeConfigure.txt", and also it reads the IP configuration file "IPConfigure.txt". "IPConfigure.txt" file is used to set up Node ID for each pocket PC. Below is an example of setting up files for the scenario as described in the development environment Diagram 3.1:
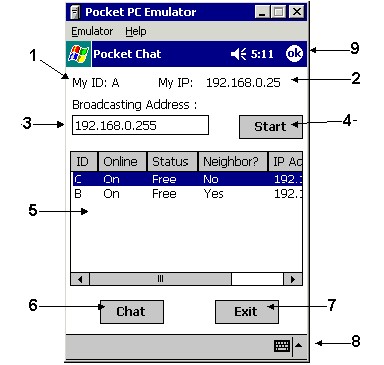
Click on the "Start" button will start the TcpUdpServer module to listen to Packets and start TcpUdpClient to send the "Awareness Packet". Pocket PC will populate a "Buddy List" as illustrated in Diagram 5.3. Below is a detailed description of each control on the interface:
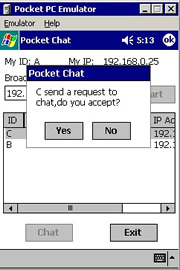
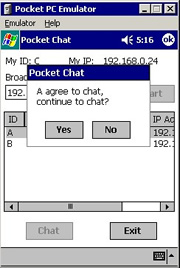
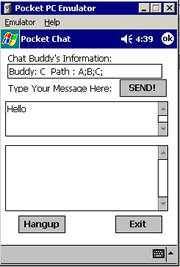
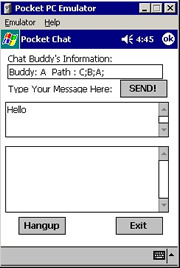
Diagram 5.4 displays the user interface when Node C select "A' of the Buddy List and click "Chat" button. A Message Box will display in Pocket PC A's interface, notify A that Pocket PC C want to chat. If Pocket PC A accepts the request, another Message Box will display in Pocket PC C's interface to notify C that A accepts the request. Both Pocket PCs will enter the "Chat" initial interface as described in Diagram 5.5. Otherwise, C will be notified that A rejects the request.
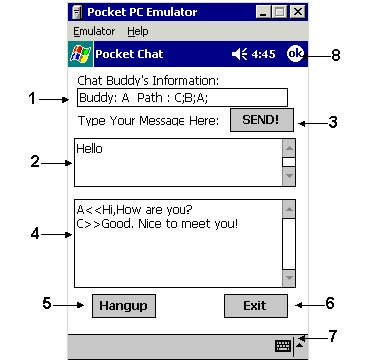
Here is the detailed description for the "Chat" interface (Diagram 5.6):
Using the "Pocket Chat" application, we tested both scenarios as Diagram 4.11 and Diagram 4.12, we observed the results at different stages of application (Awareness Stage, Route Request Stage, Route Reply Stage, Chat Stage and Hang-up stage). Awareness Stage. During this stage, "Pocket Chat" loads the configuration files, starts the UDP listening server, and sends the first "Awareness" packets out to other Packets, as well as receive "Awareness'' packets from other Pocket PCs. All Pocket PCs can correctly identify the neighbor Pocket PCs as well as Non-Neighbor Pocket PCs, thus populating the correct "Buddy List" in the interface. This process usually takes 5~10 seconds for completing the "Buddy List'. Route Request Stage. By select one Node from the "Buddy List" and clicking on the "Chat" button, Pocket PC begins the "Route Request" stage. Pocket PC sends out "Route Request" packet and other Packet PCs help it to rebroadcast to other Pocket PCs. If the packet reaches the destination node, a "Notify" Message box will pop up on the destination Pocket PC to ask whether to accept the chat request or not. When the packet reaches the destination, the packet also accumulates the "Route Path" in the packet, as well as the reverse path. It is possible that two "Route Request" packets reach the destination, for example, C->B->A and C->D->A in the Diagram 4.11 case. In our "Pocket Chat" application, as soon as Pocket PC A accepts the "Route Request" from Pocket PC C, it will ignore the other "Route Request" packets. Pocket PC A also will broadcast an "I am Busy" packet to other Pocket PCs to prevent other Pocket PC try to chat with it. And Pocket PC A will begin the Route Reply stage. This "Route Request" usually takes less than 1 second. Route Reply Stage. As soon as Pocket PC A accepts the request, it starts the "Route Reply" stage. Using the reverse "Route Path" information (A->B->C), A sends the "Reply" packet to Pocket PC B. Pocket PC B also uses the information to forward the packet to C. On Pocket PC C's screen, a "Notify" Message Box will pop up and ask Pocket PC C to proceed. If Pocket PC C accepts the request, it will enter chat stage and broadcast "I am busy" packet to other Pocket PCs. This step takes less than 1 second to complete. Chat Stage. In this stage, Pocket PC C uses the "Route Path" information (C->B->A) and Pocket PC A uses the reverse "Route Path" information (A->B->C) to chat with each other. Pocket PC B will forward the packets for both Pocket PCs. Even both Pocket PC A and C at the stage of chatting, they can still forward packets for other nodes (Awareness, Route Request, Route Reply and Chat, etc.). The latency for chatting is very minimal. Hang-up Stage. At this stage, Pocket PC C uses the "Route Path" information (C->B->A) to send a "Hang-up' packet to A, and exit the "Chat" interface. Pocket PC B forwards the packet to A. A's screen will display C's information. A then can click on the "Hangup" button to exit the program. Both C and A then broadcast "I am available now" packet to other pocket PC to update their status. The latency is also very minimal. |
|||||||||||||||||||||||||
|
Last
updated:
Wednesday, January 15, 2003
|
|||||||||||||||||||||||||
